Enable Built-in Administrator Account
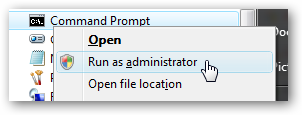


First you’ll need to open a command prompt in administrator mode by right-clicking and choosing “Run as administrator” (or use the Ctrl+Shift+Enter shortcut from the search box)
Now type the following command:
net user administrator /active:yes
You should see a message that the command completed successfully. Log out, and you’ll now see the Administrator account as a choice. (Note that the screenshots are from Vista, but this works on Windows 7)
You’ll note that there’s no password for this account, so if you want to leave it enabled you should change the password.
Disable Built-in Administrator Account
Make sure you are logged on as your regular user account, and then open an administrator mode command prompt as above. Type the following command:
net user administrator /active:no
The administrator account will now be disabled, and shouldn’t show up on the login screen anymore.
No comments:
Post a Comment